This tutorial is based on a fresh install of Ubuntu 24.04.1 LTS on a VPS. It is assumed you have full access to the root user account. You will create a SearNGX instance that can be reached via a (sub-)domain of your choosing. Therefore, it is assumed that you have full access to your domain DNS records, for example via Cloudflare. Using this tutorial, you will be able to customize the favicon and the site logo.
This tutorial is based on CyberCommander’s BlackHatWorld post and both hirad1986’s and a deleted user’s posts in SearXNG GitHub discussion #974.
Prerequisites:
- Register a domain like vyrm.in
- Create a VPS server, in my example with Strato. I am running Ubuntu 24.04.1 LTS, but this tutorial has been tested with Ubuntu 22.04 LTS and should work on other distributions.
- Establish an SSH connection with your VPS server. Your VPS host should provide instructions. Login with your root account.
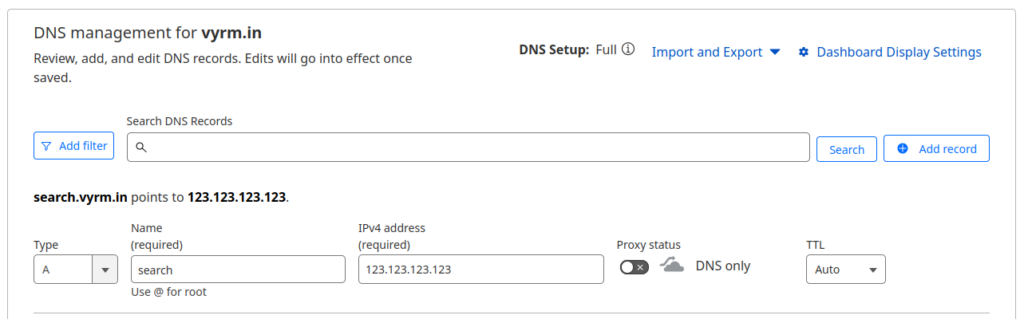
- Create an A record for your domain to the VPS server IP address like this:
- Update your Ubuntu server with:
sudo apt update && apt upgrade -yInstallation:
- Install git, docker and docker compose:
sudo apt install git docker.io docker-compose- Add firewall rules for http and https:
ufw allow http
ufw allow https- Switch to your “/usr/local” path:
cd /usr/local- Clone SearXNG using git:
sudo git clone https://github.com/searxng/searxng-docker.git- Open the cloned folder and list the contents, you should see a file called “settings.yml”:
cd searxng-docker/searxng
ls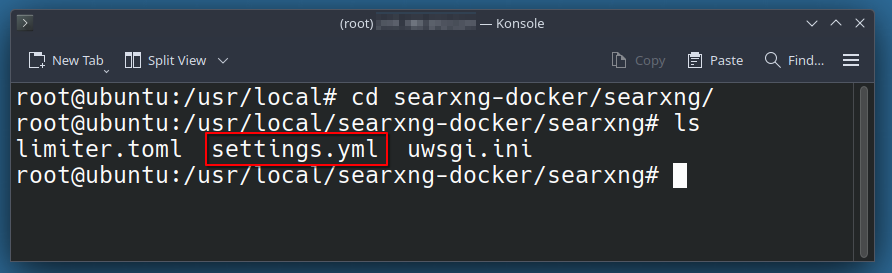
The “uwsgi.ini” file will not exist in your folder, I took this screenshot from my working install.
- Generate a secret random password to secure the instance using openssl:
openssl rand -base64 36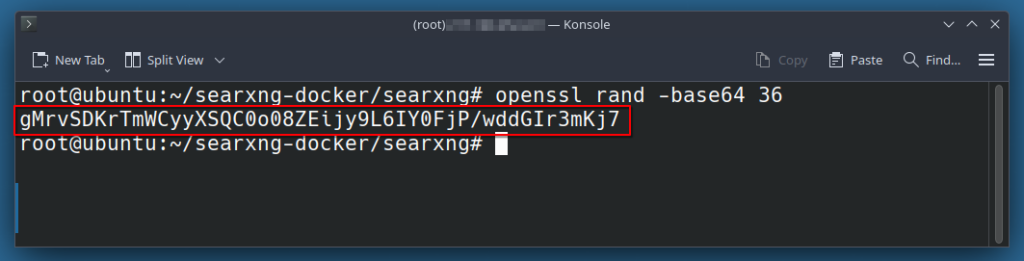
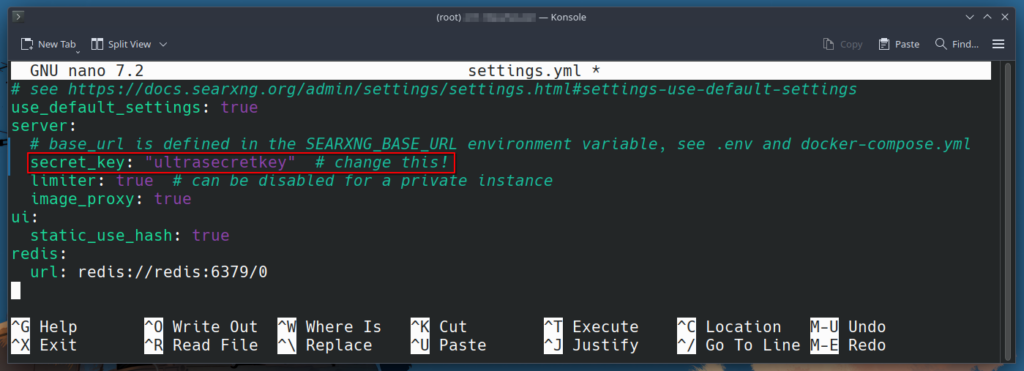
- Copy the generated password and paste it in the “settings.yml” file, replacing ultrasecretkey with your password:
nano settings.ymlbefore:
after:
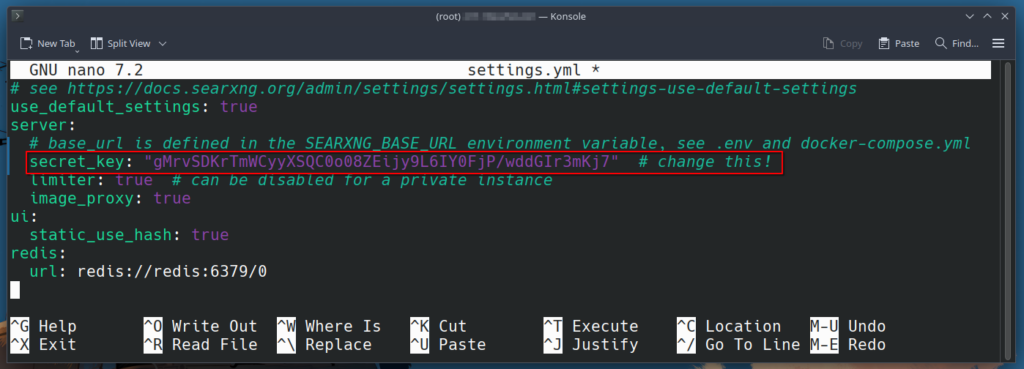
Close and save with Ctrl + O => Enter => Ctrl + X.
- Go to the previous folder and list its contents, including hidden files:
cd ..
ll- Edit the “.env” file, uncommenting the lines including SEARXNG_HOSTNAME= and LETSENCRYPT_EMAIL=. Replace the sample entries with the domain or subdomain you set in the prerequisite step 4; and any E-Mail address you desire:
nano .envbefore:

after:

Again, close and save the file with Ctrl + O => Enter => Ctrl + X.
- Start docker compose in the background, it should take a couple of seconds to set up and start everything.
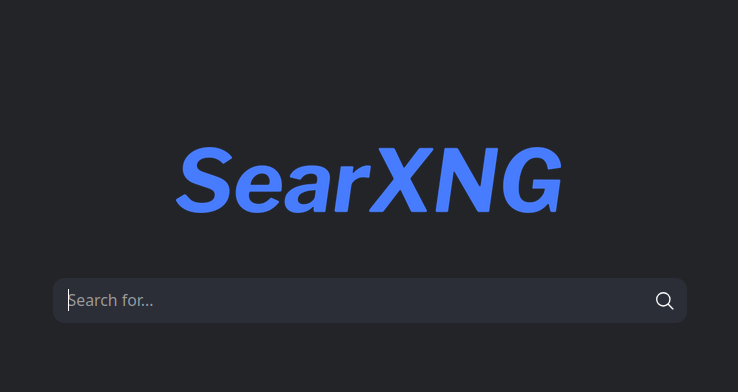
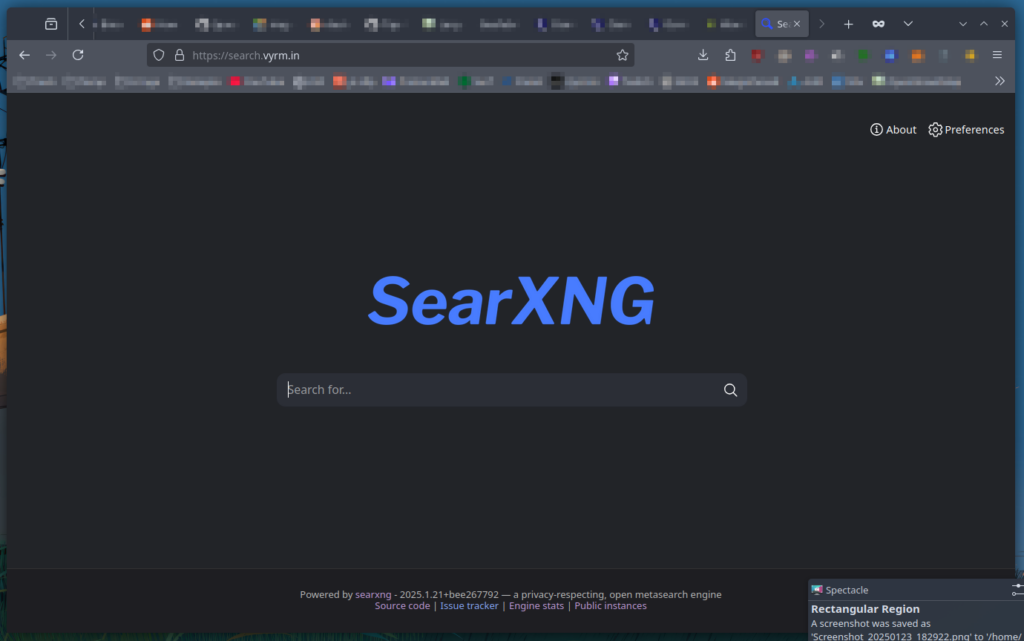
docker-compose up -d- Open your browser and type in your domain from step 9 and prerequisite step 4. The engine should now work:
Customization:
Now that you have confirmed your SearXNG instance is running, we can proceed to customize it – as an example, I will change the main page logo.
- First, get your searxng container ID with:
docker ps
- Copy the ID for later.
- Download or transfer a .png image file of your choosing to your server. You might want to use an SFTP-Client like FileZilla or a simple wget command for an easy transfer. Note down the file location. In my example, I created a Download folder at root and used SFTP to transfer my files to this new folder:
cd
mkdir Downloads
cd Downloads
ll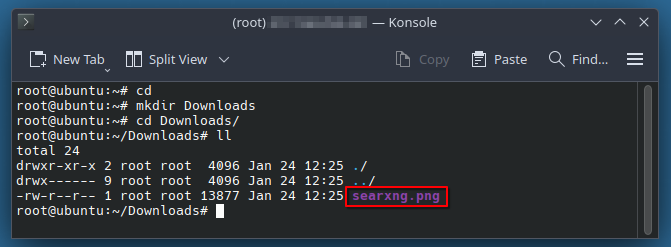
- Enter your SearXNG container and explore its folder structure:
docker exec -ti searxng /bin/sh

cd searx/static/themes/simple/img/
ls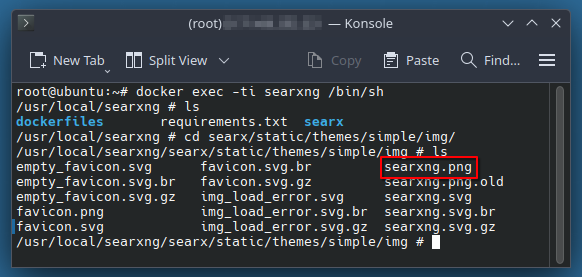
In this folder, you will find all of the graphics you will want to replace for customization of the SearXNG interface, including both raster and vector versions of all icons and logos.
- Exit the container:
exit- Copy the existing default searxng.png to a location of your choice as a backup, replacing the placeholder in the command with the container ID you copied in step 2:
docker cp placeholder:/usr/local/searxng/searx/static/themes/simple/img/searxng.png /root/Downloads/searxng.png.old
- Now ensure your custom graphic is named searxng.png, replacing the placeholder in the code with your own file name:
mv /root/Downloads/placeholder.png /root/Downloads/searxng.png- Copy your custom image file into the container, again replacing the placeholder in the command with the container ID you copied in step 2:
docker cp /root/Downloads/searxng.png placeholder:/usr/local/searxng/searx/static/themes/simple/img/searxng.png

- Reboot your server and enjoy the new design in your browser! Note: Your browser might have saved the old image in the cache already. Empty your browser cache according to applicable instructions or just try to open the search engine on your phone, in a “private browsing” tab or in another browser.
reboot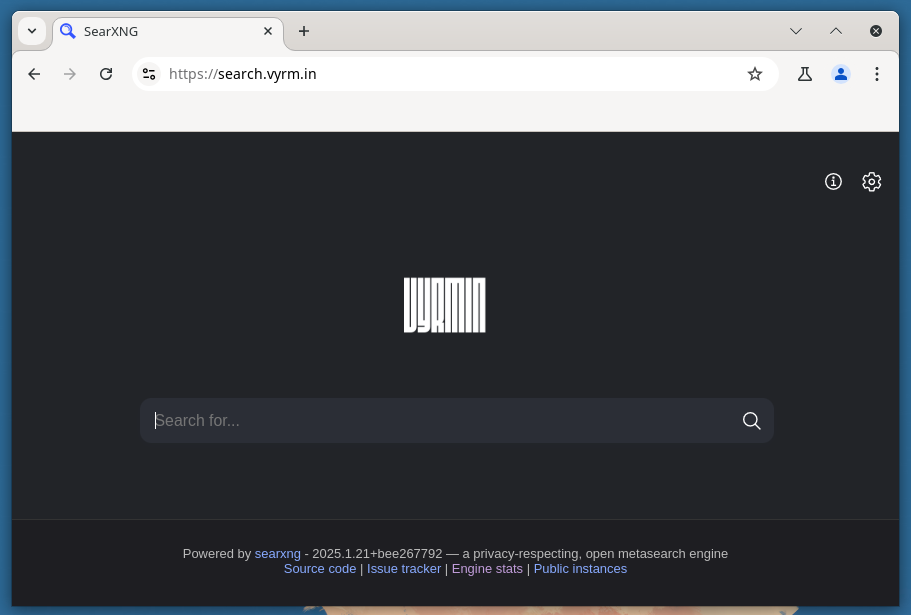
Enjoy your customized, private search engine!
Please not that this is only a temporary customization. Should you update the container, the image will revert to the stock one. Consult this post by SearXNG maintainer return42 on how to fork the repo to customize your instance permanently.